
PowerApps is part of Office 365 and allows power users to create business applications in as little as a couple of hours. In this article, I’m going to show you how to start learning the basics of PowerApps. Once you’ve read this post, check out the 10-Book PowerApps Bundle for $19 (for a limited time), this will really accelerate your PowerApps learning.
How do I start developing a PowerApp?
PowerApps development can either be completed in PowerApps Studio, which is a downloadable client application or directly inside your browser.
Previously, PowerApps Studio had much more functionality, however, at the moment the browser has caught up and has virtually the same features. The browser version has also become much faster to use than ever before.
Start with a template …
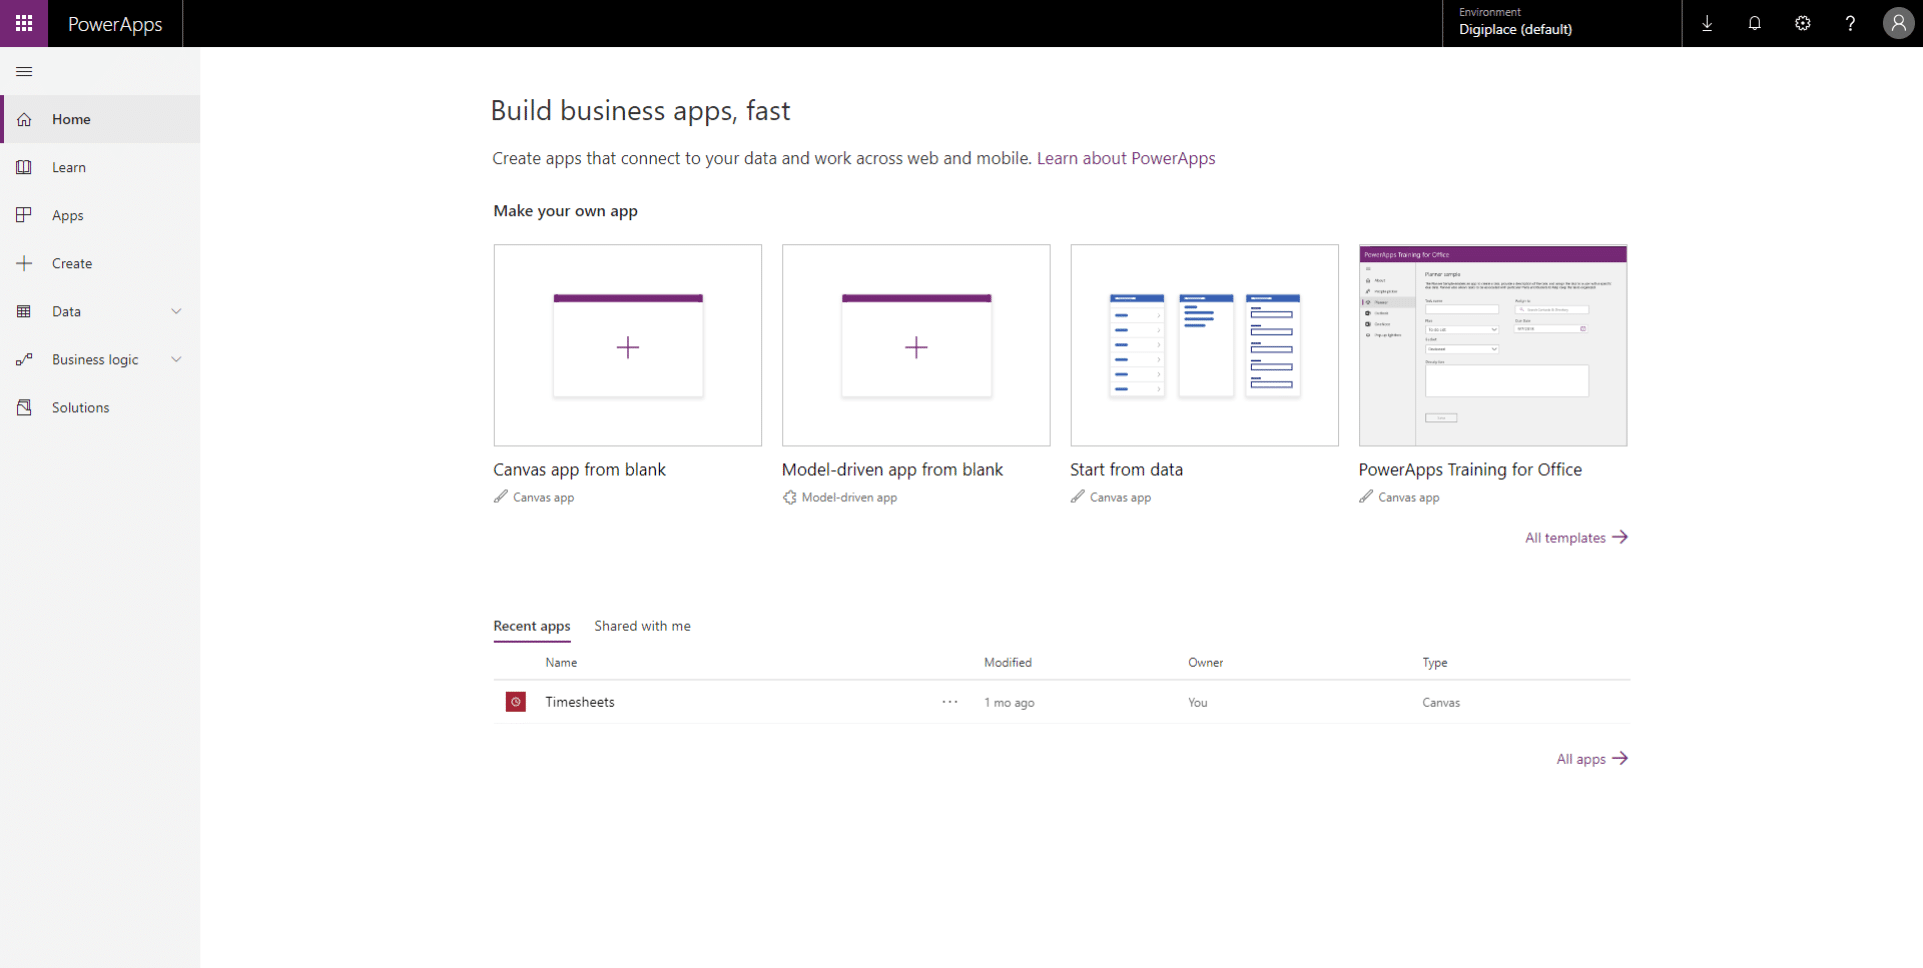
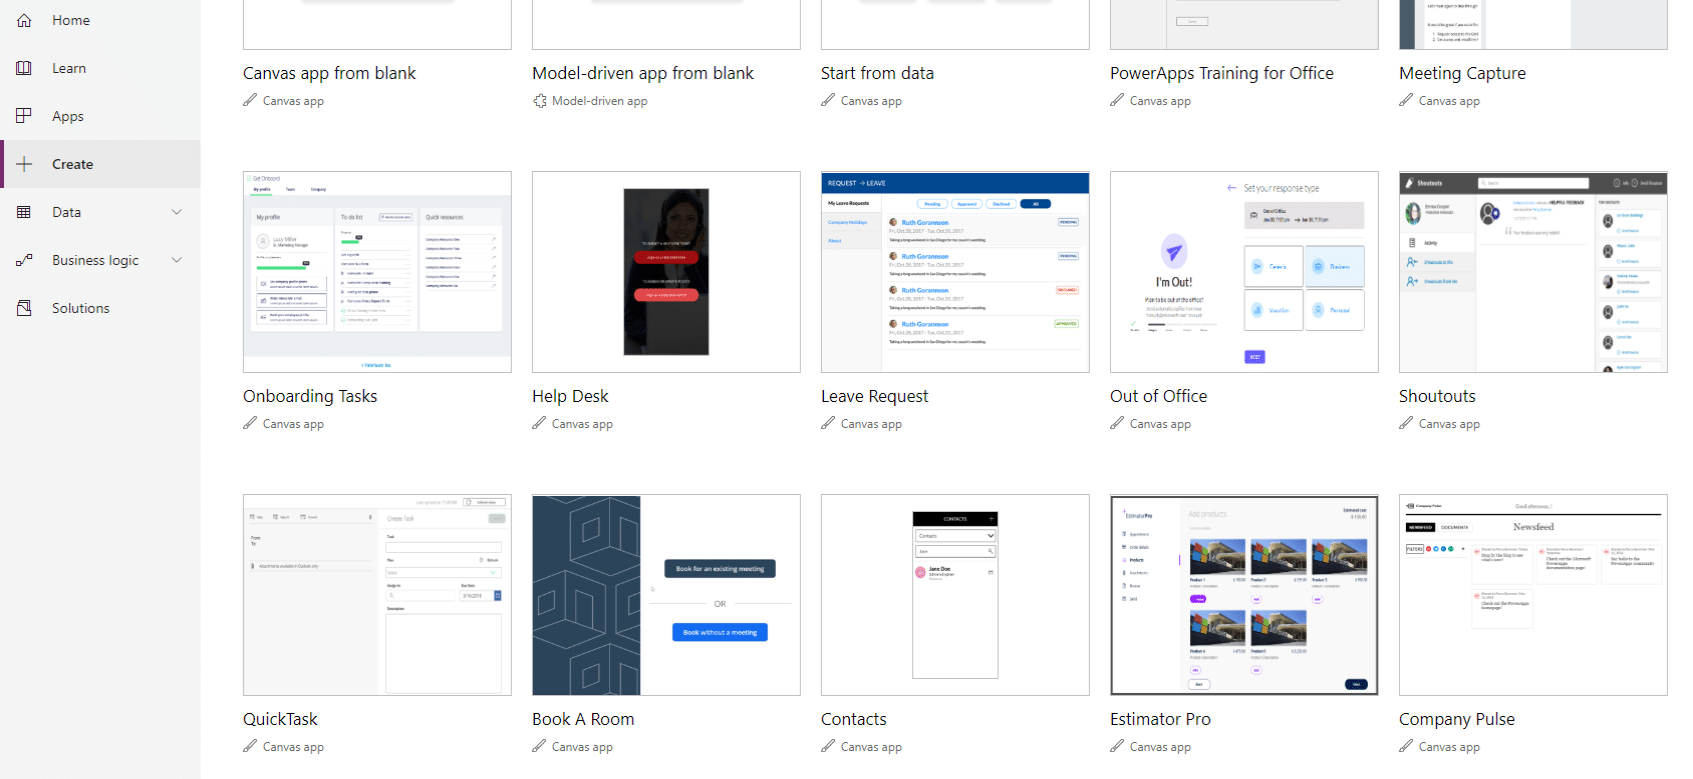
My recommendation, if you’re just starting, is to create your first PowerApp from one of the templates included in the product.
Initially, don’t worry about how your PowerApp will look. Just click on the “create” button (on the PowerApps start screen) and pick a template to use in your business environment. Even if there is no need for you to use this business application, it can be an excellent way to learn about what’s possible and share ideas with your team.
Branding and building for mobile devices
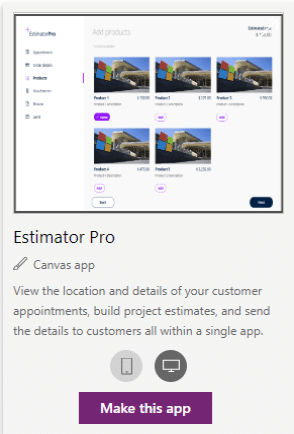
You will notice that some applications in the templates section have multiple design modes. In the example of the Estimator Pro PowerApp, there are two design modes: the phone factor and tablet factor.
A phone factor doesn’t mean your PowerApp cannot be displayed on a PC or tablet; it means it will work optimally for a phone (having a small rectangular design).
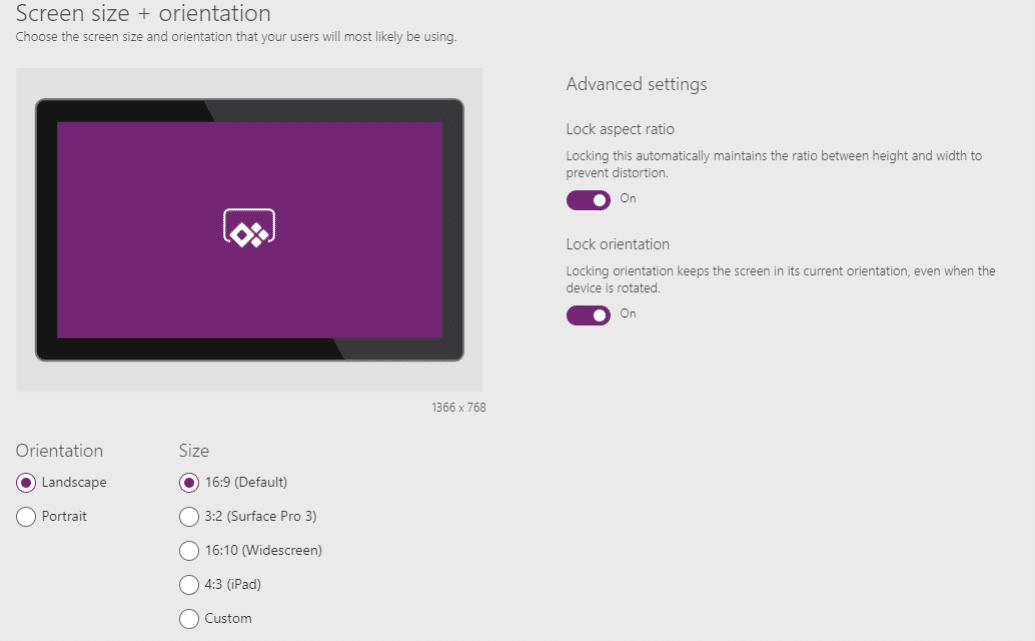
It is up to the PowerApp creator to choose the design mode, the orientation of the PowerApp (landscape or portrait) and also consider whether the aspect ratio and orientation should be locked.
I am sure you will agree, this is a great start! In just a few clicks it gives you, the creator, a working PowerApp. However, keep in mind that this is only the start of your PowerApp creation. The branding and responsiveness factors are up to you.
Next to the “orientation” option, the user can also choose the required “size” of the target device.
Explaining The PowerApp User interface
The PowerApps interface looks as follows, where each section has its purpose.
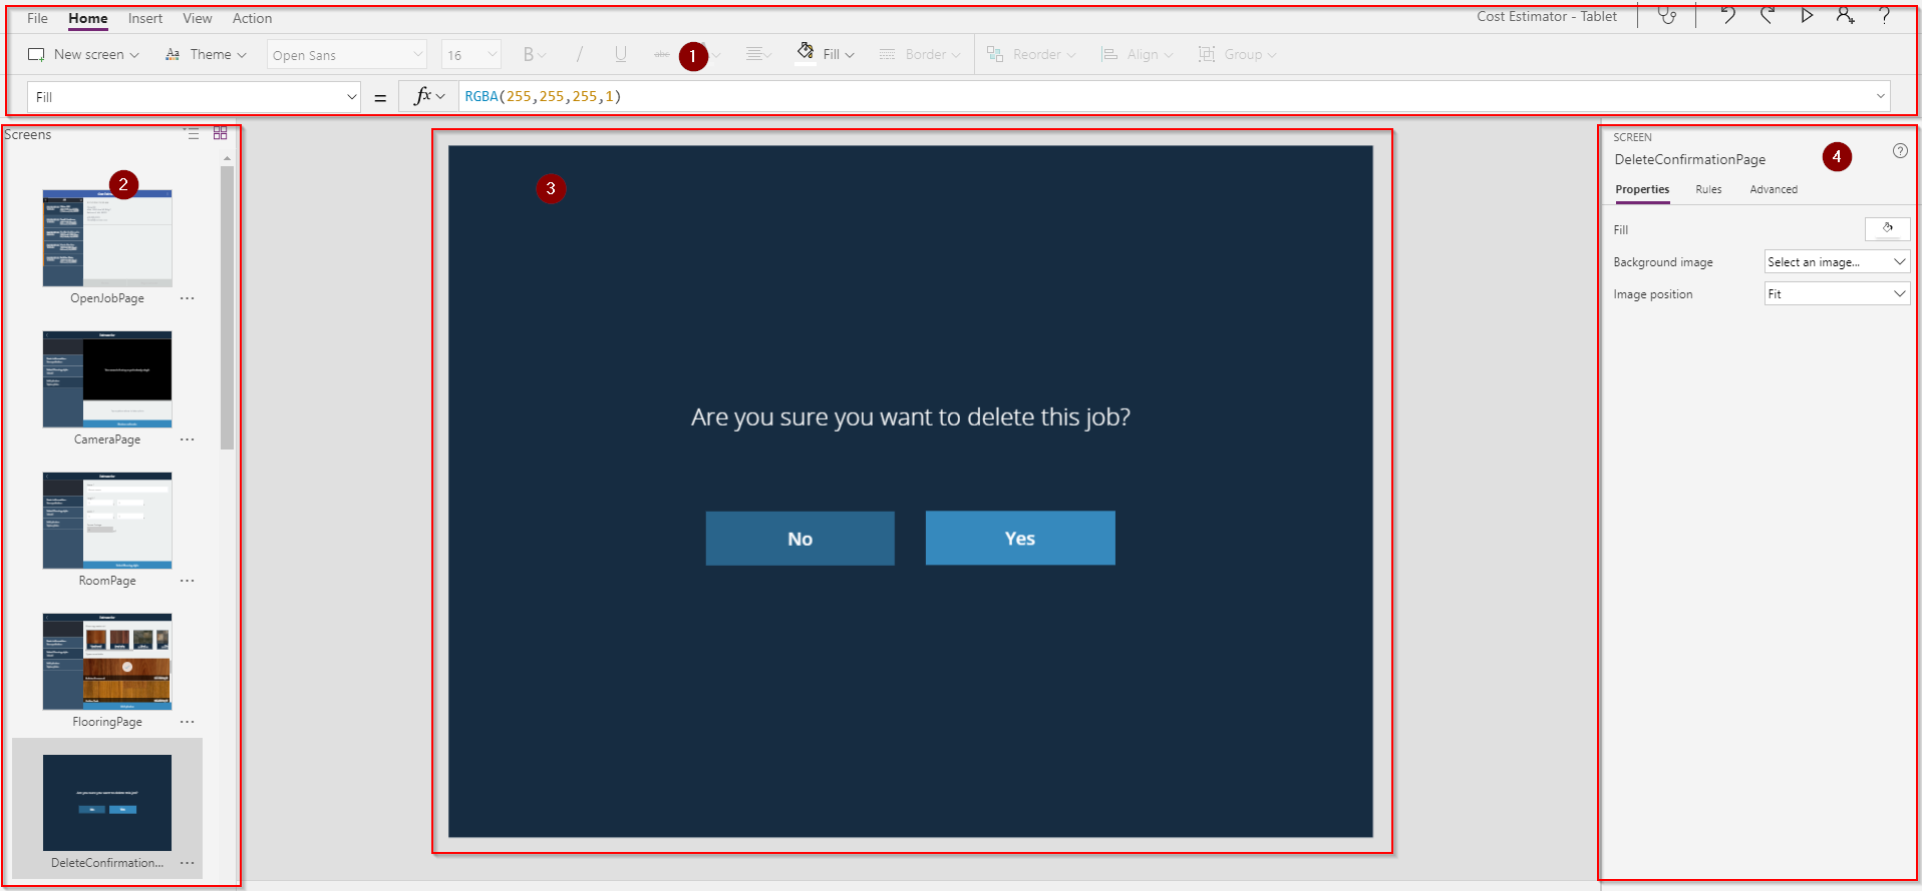
The first section (top) is the simplest to describe because this is the most familiar one: the ribbon. Microsoft introduced it in Office 2007, and since then it has never left. Now it is also available in the PowerApps designer and allows you to achieve the same functionality that you are used to in Excel or Word. A few examples of what you can do are underlining text, aligning content and setting formulas on your objects (in comparison to formulas on cells in Excel).
If you are used to Excel, there will be a mind-shift you will have to go through when creating mobile applications instead of creating Excel worksheets. The most significant difference is that you will have to start thinking about “screens”. These will be shown in the second section (bottom-left). The first screen in this section will be your start screen with subsequent screens displayed in order below. To change the order of these screens, simply drag them up or down to your preferred location, think of it being similar to the slide sorter in PowerPoint.
In the third section (bottom-middle), your PowerApp screens are displayed. You can use this section to select your controls (and afterwards setting formulas on these) or to simply drag objects to another location.
In the fourth section (bottom-right), you can define the attributes for the selected control, like in the formula bar. You will see there is quite some overlap between these two sections. Some attributes can only be selected in this section though, for example connecting to your data and picking the correct data layout template.
Branding your PowerApp
When branding your PowerApps, I recommend that you have a consistent brand and colour. Be sure to set your colour only once (for example on the top bar of the first screen). On the other screens, don’t copy this colour. You should copy the attribute (“fill”) from the first screen’s top bar. Using one value for your colour is how you maintain consistent branding throughout your PowerApp.
![]()
In the screenshot above, I have set my fill to a colour, then referenced it as shown below:
![]()
Formulas and Attributes
PowerApps contain many formulas and attributes. Formulas are always coupled to an attribute; attributes are dependent on the object you have selected. For example, a screen will have attributes such as BackgroundImage, Fill, ImagePosition, LoadingSpinner and LoadingSpinnerColor allowing you to set some design preference. It will also have some start handlers like OnHidden, OnStart and OnVisible allowing you to execute some actions like refreshing data sources etc.
Other objects will have different attributes like OnSelect where you can define what should happen when you click the object.

Objects that allow you to show data will have the attribute Items where you can define your correct data source.

Top 10 Formulas
There are around 150 formulas that you can use with PowerApps, details of which can all be found on Microsoft’s documentation site. I asked our PowerApps group on Facebook which ones they used most frequently and listed them below.
- If: Determines if an expression evaluates to true. If it is then a specified value is used, otherwise, a default value is returned.
- SortByColumns: Allows you to sort a table by one or more columns.
- Sort: Sorts a table based on a given formula and sort order.
- SubmitForm: Saves the contents for a form to the underlying data source.
- Filter: Allows you to filter a set of records based on a given formula.
- Search: Allows you to search for a set of records based on a given search query.
- UpdateContext: Allows you to store any useful value in a context variable. Scoped to the PowerAppsScreen.
- Set: Similar to UpdateContext only this time the variables stored are globally scoped.
- Lookup: Finds the first row in a table matching a specified formula. Returns a single record.
- ClearCollect: Clears all records from a collection and then adds a different set of records to the same collection.
- UpdateIf: Update a value if a condition is true.
Connecting to external data
PowerApps has great support to connect to data from other systems. There are already more than 180 connectors available. Examples of the most common ones are shown in the screenshot below:

Connecting to on-premises data

It’s also possible to leverage data that’s stored in your on-premises data stores. This is achieved by using a gateway. To set up a gateway you will need to use a data source from one of the following: SQL Server, SharePoint, Oracle, Informix, Filesystem, DB2. The process for configuring and managing your gateway can be found in this article.
Connecting to data in the Common Data Service
Microsoft PowerApps can utilise data via a service known as the Common Data Service. In Microsoft’s words – “The Common Data Service (CDS) for Apps lets you securely store and manage data that’s used by business applications. Data within CDS for Apps is stored within a set of entities. An entity is a set of records used to store data, similar to how a table stores data within a database.”
The poster below gives an overview of which entities currently exist within the common data model.

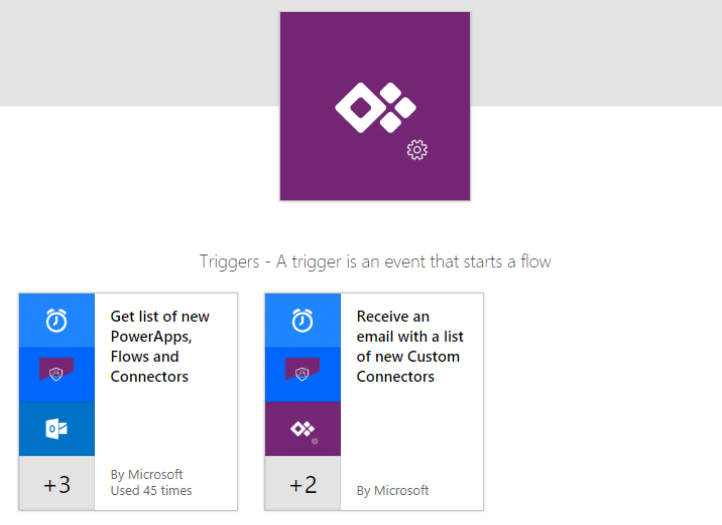
Do more in PowerApps with Microsoft Flow
PowerApps allows you to create mobile applications easily and quickly. Along with your mobile application, you will probably also need some automation to be done in the background, like for example, sending e-mails when a user clicks on a reservation button. Simple tasks like this can easily be done in PowerApps, however, when more advanced logic is needed, Microsoft Flow offers more flexibility to handle this.
PowerApps integrates very well with Flow, and they make their connection via the PowerApps and Flow buttons, each one allowing the other to be started. You can even use MS Flow to handle some PowerApps maintenance and governance.
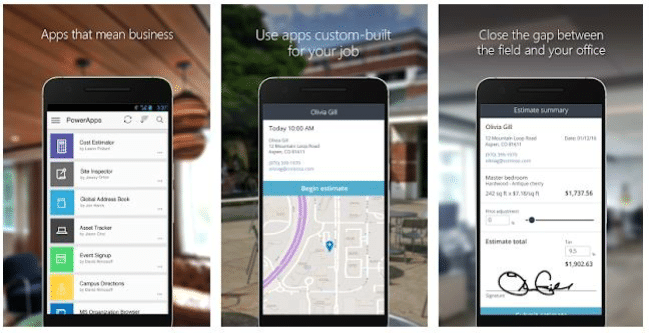
Using PowerApps on a mobile device
To run a PowerApp on your mobile device simply install the PowerApps application via the Google Play Store (for Android devices) or Apple App Store (for Apple devices). The first time you start the PowerApps app, it will ask you to sign in to your organizational account. When this is done, all your company apps will be displayed here (at least all the ones that are shared with you). If you have a couple of apps that you use frequently you can add them to your home screen (pulling them out of the PowerApp app) – however, this functionality only works on Android at this moment.
The screenshots below are sourced on the Google Play store (provided by Microsoft) and give a great example of what a PowerApp looks like on a mobile device.
If you don’t want to install another app, then don’t worry, you can access them via your browser.
Going Offline with PowerApps
One of the major use cases for PowerApps is to allow workers to use apps on the road. One common scenario for a remote worker (such as a travelling salesman) is that they may not always be connected to the internet.
You will be pleased to know that PowerApps does offer some support for working ‘offline’. To build support in our PowerApp to handle offline data can be achieved by utilising a few useful expressions as follows:
- Connection.Connected: Allows us to test if our PowerApp is connected to the data source. If it’s isn’t then we need to save and query the data from the local storage (on the mobile device).
- Clear: This will remove records from your collection.
- Collect: Allows you to store records in the local cache, if we have no connection.
- LoadData: Allows you to load data into a collection locally.
- SaveData: Allows you to save data to a collection locally.
- Patch: Updates/creates a record in the data source. Ideal if you have a connection.
As you can see, offline support can be quite a complex subject if you’re not a developer by trade, however, once you’ve grasped the concepts it’s quite straightforward.
How to support multiple languages
It is entirely possible to create a PowerApp that renders text in the language of the logged on user. Note: If you think your PowerApp may need to be multi-lingual in the future then it’s wise to provide support from day 1. Delaying it will result in you have to refactor every label, text, tooltip and message which can be a painful job.
Before we do anything, we need to work out what language the user uses. This can be determined by calling the “language” function. “Language()” returns the “language”, “script” and “region” for the current user as a tag, e.g. “en-GB” would return for someone living in Great Britain.
The golden rule when adding support for multiple languages in your PowerApp is not to hardcode text. Instead, you should use a function that looks up the language from a local data set that stores the key name and string. Your dataset can be imported from something like Excel and would be in this format.
| Language | Key | StringName |
| en | SaveTooltip | Save the customer |
| pt | SaveTooltip | Salve o cliente |
| fr | SaveTooltip | Sauver le client |
Now that we know which language the user needs and have a language dictionary, all we need to do is perform a lookup like this (note, you will more often than not store the user’s language somewhere locally):
LookUp(LanguageDict, Key = “SaveTooltip” And Language = “en”)
Summary and other useful resources
So in this article, I’ve shown you how to get started, given a brief tour of the PowerApps interface and explained some of the more popular formulas that you may want to use. We moved on to look at how to connect to external data sources, data held on premises as well as data in the Common Data Service. We also considered the possibility of linking with Microsoft Flow and using PowerApps on Mobile devices along with how to cope when the user is offline or out of the office. Finally, we looked at how to provide information to the user in their local language.
If you’d like to find out more, then (along with Laura Graham Brown) I’ve written a Beginners Guide to PowerApps e-book that you can download from here…
Alternatively, why not join us for the Collab365 PowerApps Virtual Summit on March 27th where Laura, myself (and 8 other PowerApps experts) are presenting sessions showcasing the use of PowerApps and hopefully providing some inspiration to help you benefit from these amazingly powerful features.
